Florida Driveway Prep: Avoid Costly Rework Mistakes
By Space Coast Daily // October 24, 2025
Most homeowners and property managers assume that hiring a licensed contractor is enough to guarantee a driveway that will last. Unfortunately, Florida’s unique combination of extreme weather conditions, high water tables, and aggressive soil chemistry means that “standard” installation practices used in other states simply don’t hold up here.
The difference between a driveway that performs for decades and one that fails within a few years often comes down to decisions made during the planning and preparation phases; decisions that are invisible once the concrete is poured or the asphalt is laid. Understanding the true cost of these early mistakes is the first step toward making smarter, more durable choices for your property.
The Hidden Price of Redoing a Driveway in Florida
Florida’s climate is unrelentingly tough on driveways. Between scorching heat, sudden torrential downpours, and the ever-present threat of hurricanes, even small specification errors can quickly snowball into major failures. These failures include cracks, potholes, and dangerous trip hazards.
The upfront savings from cutting corners are a mirage, quickly evaporating when faced with the cost of demolition and rework. Consider the true five-year cost of ownership:
| Scenario | Average Initial Cost | Five-Year Repair/Rework Cost | True Five-Year Cost
|
|---|---|---|---|
| Built to spec (concrete) | $7,000 | $0-$800 (minor sealing) | ≈ $7,800 |
| Spec shortcuts (concrete) | $6,200 | $6,500 (demo & repour) | ≈ $12,700 |
| Built to spec (asphalt) | $4,500 | $600 (routine sealing) | ≈ $5,100 |
| Spec shortcuts (asphalt) | $4,000 | $4,800 (overlay & patch) | ≈ $8,800 |
This guide breaks down the most common surface-prep and specification pitfalls our inspectors see statewide. It also provides clear, actionable steps on how to avoid them. By adhering to these professional standards, you can protect your property and save money.
By adhering to these professional standards, you can protect your property and save money in three critical ways:
- Save thousands of dollars in avoidable rework and premature replacement costs.
- Protect your property’s curb appeal and value through Florida’s punishing heat and storm seasons.
- Ensure your project stays in compliance with local building codes and strict HOA guidelines.
Concrete Driveways: Surface-Prep Mistakes That Guarantee Cracks
Concrete is known for its strength and durability, but these qualities are entirely dependent on what lies beneath. In Florida, shortcuts in preparation are a direct path to failure. How it’s treated during placement is equally important for long-term stability. Here is how you can ensure quality:
Base Prep Sets the Stage for Longevity
A concrete slab’s compressive strength is meaningless if its foundation is unstable. Florida’s characteristically sandy subgrade is highly permeable and prone to shifting if not properly prepared.
To create a stable platform, the subgrade must be stabilized and conditioned to achieve 95 percent Modified Proctor density. Here are the three critical steps to ensure your subgrade performs as intended:
- Adding a Granular Base: A layer of 4 to 6 inches of DOT-graded granular base material, such as crushed limestone or recycled asphalt product (RAP), is essential. This distributes loads and provides a stable, non-shifting foundation.
- Compacting in Lifts: The base material should be laid down, watered, and compacted in 2-inch layers. This is done using a mechanical plate compactor or roller until engineering tests confirm it has reached the required density.
- Verifying Drainage: Positive drainage is non-negotiable, and the entire base must be graded with a minimum slope of 1/8 inch per foot. This directs water away from the home’s foundation and other structures, preventing damage over time.
Thickness and Jointing Essentials
The Florida Building Code references guidelines from the American Concrete Institute (ACI), specifically ACI 302 for residential slabs-on-ground. To comply and ensure a long-lasting surface, stick to these minimums:
- Slab Thickness: A 4-inch minimum thickness is required for standard passenger vehicles. If you plan to park a heavier vehicle like an RV or boat trailer, increase the thickness to 6 inches to handle the additional load.
- Reinforcement: Steel reinforcement is crucial for managing tensile forces and keeping cracks tight. Options include #3 or #4 rebar placed in a grid pattern or welded wire fabric held up on chairs to be in the middle third of the slab.
- Control Joints: Concrete shrinks as it cures, and control joints provide a weakened plane for cracks to form in a straight line. These joints should be spaced every 8 to 10 feet and cut to a depth of one-quarter of the slab’s thickness.
- Edge Thickening: At high-stress areas like the street apron and garage entrance, the edges of the slab should be thickened. This provides extra support against heavy and repeated loads from vehicles.
Finishing and Curing for Florida Humidity
Florida’s high humidity presents a unique challenge during the finishing process. It can trick inexperienced finishers into working the surface too early by slowing the evaporation of bleed water. Troweling prematurely traps this water beneath the surface, creating a weak, porous top layer.
For curing, you must maintain moisture for at least seven days, either with wet-curing or a liquid curing compound. After 28 days, apply a breathable, siloxane-based penetrating sealer to protect against moisture and stains. Adding a silica grit provides excellent slip resistance in wet conditions.
Specification Pitfalls That Accelerate Raveling and Rutting
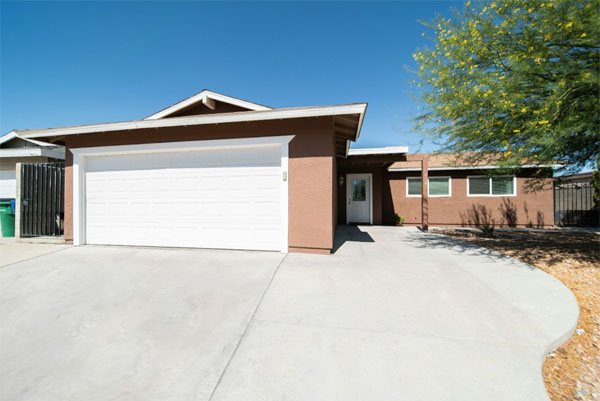
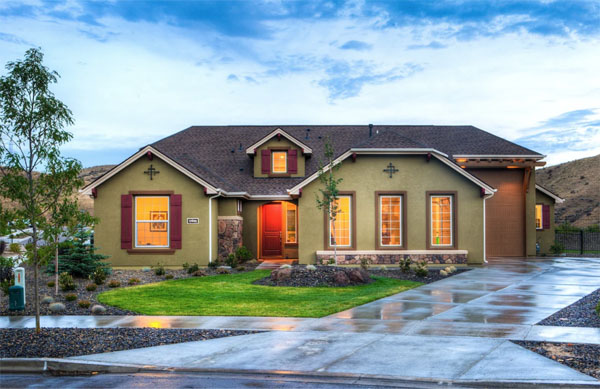
Alt text: Mid-century modern home with concrete driveway.
Asphalt is a flexible pavement, but it requires strict adherence to mix design and installation protocols. This is especially true to withstand Florida’s intense heat and traffic loads. Cutting corners during this phase will lead to premature failure.
Mix Design and Layer Thickness for Hot Climates
Asphalt mixes designed for hot climates require polymer-modified binders that resist rutting under sustained high temperatures. For residential surfaces, a ½-inch nominal maximum aggregate size provides a smooth, tight surface that performs well in tropical and subtropical conditions. Proper layer thickness is equally critical to long-term performance:
- A 1 ½-inch compacted surface course should be placed over a
- 2-inch compacted binder course for standard driveways. For very light traffic, a single 4-inch lift may be acceptable.
Temperature control during installation is paramount. The hot mix must be laid down at a minimum of 300°F and compacted properly before it cools down. Failing to achieve proper compaction density is a surefire way to invite premature rutting.
The Foundation of Asphalt Care – Timely Sealcoating
Unsealed asphalt is vulnerable to Florida’s intense UV radiation, which oxidizes the liquid binder that holds the aggregate together. This leads to cracking. Industry best practice establishes a clear maintenance timeline to prevent this damage.
The first sealcoat should be applied approximately 90 days after placement, once the pavement has fully cured. When choosing a protective layer, it is important to meet local environmental ordinances. For instance, a water-based, VOC-compliant driveway coating offers robust protection without the harsh odors of older systems.
Crack and Pothole Repair Protocol
Even well-built asphalt will eventually form cracks. Your response time is what determines whether it’s a small maintenance task or a major repair bill. A professional repair protocol involves several key steps to ensure a lasting fix. A professional repair protocol involves several key steps to ensure a lasting fix:
- Route the Cracks: Use a crack router to create a clean ½-inch by ½-inch reservoir along the crack. This allows the sealant to penetrate deeply and form a flexible, durable band.
- Clean and Prepare: Thoroughly clean the routed reservoir with high-pressure compressed air and a heat lance. This removes all debris and moisture, ensuring a strong bond.
- Fill with Sealant: Fill the prepared crack with a hot-applied, rubberized sealant. For potholes, the damaged area should be cut, tack coated, filled with new mix, and compacted flush.
Climate-Specific Threats Florida Throws at Your Driveway
Understanding Florida’s unique environmental challenges is crucial for building resilient driveways. The state’s weather patterns pose a constant threat to pavement integrity. Homeowners must be proactive to avoid costly damage. Four primary factors accelerate driveway deterioration across the state:
- UV Degradation: The relentless sun oxidizes asphalt binders, making them brittle, and can bleach the color from concrete, affecting its appearance and integrity.
- Thermal Cycling: The daily cycle of intense heat followed by sudden rain showers causes rapid expansion and contraction, putting constant stress on both concrete and asphalt surfaces.
- Hurricane Water Intrusion: Wind-driven rain can force moisture deep into micro-cracks and unsealed joints, saturating the base layer and weakening the entire pavement structure.
- Sandy Soils: Florida’s soils are highly permeable. If subgrades are not compacted to specification, water can easily wash away the base material, creating voids that lead to settlement and failure.
Preventive Maintenance & Emergency Response Toolbox
A combination of regular upkeep and a ready-to-go emergency plan can save thousands in repairs. Proactive care is far less expensive than reactive reconstruction. A simple checklist can make a significant difference. The following maintenance routines and emergency protocols provide a practical framework for protecting your investment year-round:
Regular Cleaning and Stain Prevention Tips
- Pressure-wash concrete surfaces with a machine that does not exceed 2,000 psi. Use a 25-degree fan tip to avoid etching the surface and causing damage.
- Address oil and fluid spots immediately with a quality degreaser before they have time to penetrate and permanently stain the surface.
- Keep roof gutters clean and ensure that downspouts discharge water at least 5 feet away from driveway edges to prevent erosion of the base material.
Emergency Weather Response Checklist
Within 24 hours of a major storm passing, take these critical steps to mitigate damage and protect your driveway from further harm:
- Remove all standing water from the driveway surface using push brooms or pumps to prevent saturation of the base layer.
- Inspect all edges for signs of wash-outs or erosion. Immediately backfill any voids with compacted soil or gravel to support the pavement edge.
- Apply a high-quality cold patch to any new potholes as a temporary fix. This prevents them from expanding and allowing further water intrusion.
- Document all damages with timestamped photos to support insurance claims and to provide clear information to your repair contractor.
DIY vs. Hiring Licensed Florida Pros – A Cost-Benefit Reality Check
While the upfront cost of a licensed contractor may seem higher, it includes critical protections and expertise. These benefits are often overlooked in a DIY or cheap-labor scenario. The true cost goes beyond the initial price tag. Here’s a side-by-side comparison of what you’ll pay for common driveway projects across three approaches:
| Task | DIY Cost (tools + materials) | Unlicensed Labor | Licensed Contractor |
|---|---|---|---|
| Pour 600 sf concrete drive | $3,400 | $3,000 | $6,800 |
| 2-in. asphalt overlay | $2,900 | $2,600 | $4,500 |
| Annual sealcoating | $650 | $550 | $900 |
These numbers exclude hidden costs like city fines for permit violations, HOA penalties, and potential medical bills if a helper gets injured on your property.
Licensed and insured contractors bring indispensable value. They offer expertise and financial protection that unskilled labor cannot provide. This ensures a quality result that complies with all regulations. Specifically, professional contractors provide critical safeguards and capabilities that DIY or unlicensed workers simply cannot match:
- Proper personal protective equipment (PPE) and traffic control setups for safety.
- General liability and worker’s compensation coverage that protects you from financial risk.
- Deep familiarity with FDOT specifications and local municipal permitting processes.
- Access to professional-grade equipment that homeowners rarely rent or operate correctly.
Skip the Rework Headache
Florida’s relentless combination of sun, sand, and storms leaves no margin for error or sloppy specifications. A driveway is a significant investment in your property’s value and functionality. Protecting that investment starts with building it correctly from the ground up.
By focusing on the fundamentals, you can ensure a durable, long-lasting surface. A well-built driveway withstands the elements and adds to your home’s curb appeal for years to come. Remember these core principles for success.